 Build

Short answer: if phpMyAdmin fails on a big WordPress database, split the .sql file into smaller parts that each end on a complete SQL statement, then import them one by one, in order. That is how we restored a live WordPress site with a 245 MB database on a Hostinger shared hosting plan after phpMyAdmin stopped with error 500. Below is the full process we used on October 16, 2026, including the problems we hit. (This is a real move we did ourselves; see how we test.)
We restored everything on a free temporary domain first, so the live website stayed online and untouched until the new copy was tested. The same manual method works whether you move between two Hostinger accounts or from another host.
Why We Restored It Manually
We were moving a WordPress site from one Hostinger account to another. Hostinger's "Migrate website" tool refused because the site was already hosted at Hostinger ("We do not support migration of this site"), and "Transfer ownership" is a paid option. So we took the backup and restored it ourselves. It is free and you see every step.
What You Need Before You Start
- A files backup. Ours was a
.tar.gzarchive of about 256 MB. Inside it,domains/your-domain/public_htmlis the website:wp-admin,wp-includes,wp-contentandwp-config.php. - A database backup. One file ending in
.sql.gz. Ours was 245 MB once uncompressed. - A copy of your DNS records. Write down or export every record, especially email (MX, SPF, DKIM, DMARC). You will see why below.
- A hosting plan with a temporary domain. Hostinger creates a free temporary address for a new site, which is perfect for testing.
- Your old site still online. Do not delete anything until the new copy works.
Step by Step: Restoring the Backup
Upload and extract the files
We zipped the
public_htmlfolder from the backup (without cache folders, which you do not need), uploaded the zip in File Manager and extracted it intopublic_htmlof the new site. One extract attempt returned a 409 error, so check that the files really landed before you move on.Create a new database and user
In hPanel, open Databases and create a new MySQL database with its own user and password. Watch out: Chrome autofilled a saved username and password into this form for us. Clear both fields and type your own.
Import the database in phpMyAdmin
Open phpMyAdmin for the new database, go to the Import tab, choose your
.sql.gzfile and click Import. For a small database, that is it. Ours was 245 MB uncompressed, and the import stopped with error 500. The fix is in the next section.Point wp-config.php to the new database
Edit
wp-config.phpin File Manager and changeDB_NAME,DB_USERandDB_PASSWORDto the new database details.Add two temporary lines for the temporary domain
The database still points to your real domain, so the copy would redirect there. To test on the temporary address, add these two lines to
wp-config.php:define('WP_HOME', 'https://your-temporary-address');define('WP_SITEURL', 'https://your-temporary-address');Remove them again after you connect the real domain.
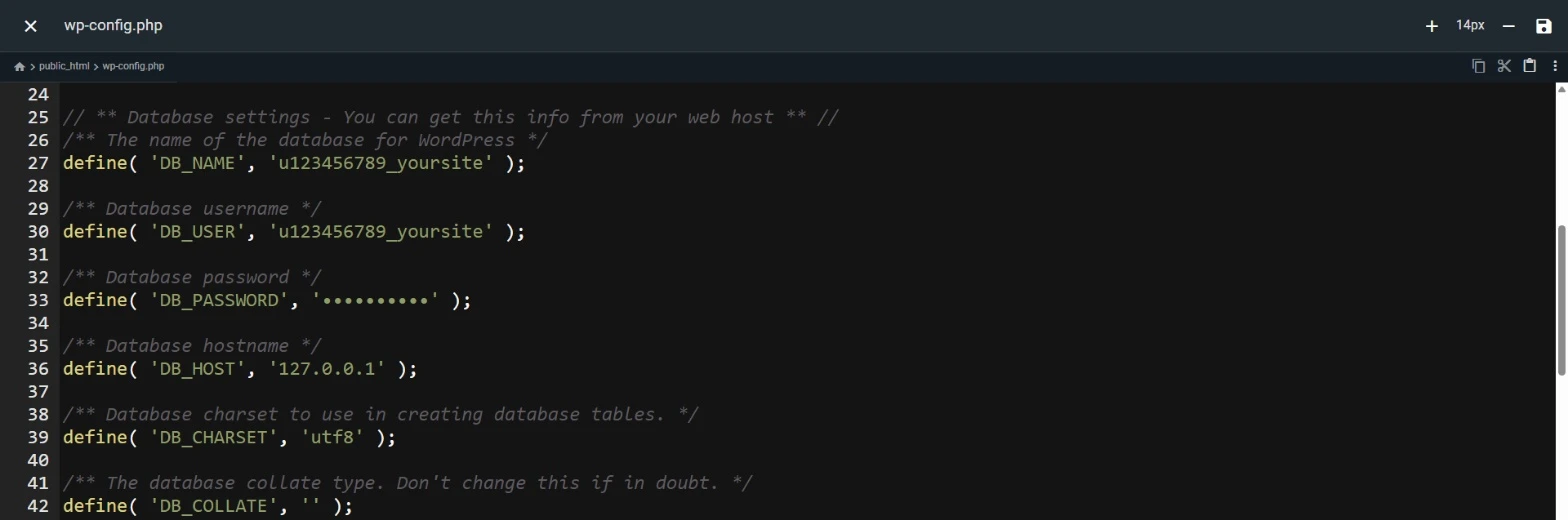
The database lines in wp-config.php (our values are replaced with placeholders).
phpMyAdmin Error 500? Split the SQL File
phpMyAdmin runs inside the web server, so a very large import can stop before it finishes. Instead of one 245 MB import, we split the dump into 13 gzip parts of roughly 20 MB of SQL each with a small Python script, and imported part01 to part13 in order.
A safe split follows a few rules. If you cut the file at a random line, the import breaks.
- Every part ends on a complete SQL statement. Never cut in the middle of a statement.
- Long INSERT statements are cut between rows. The last row of a part ends with
;, and the next part starts with the sameINSERT INTO ... VALUESheader again. - Every part starts with the same settings, including
SET NAMES utf8mb4;andSET FOREIGN_KEY_CHECKS=0;, so each part works on its own. - Import the parts in order. The first part creates the tables; the later parts fill them.
- Keep the parts compressed (
.sql.gz) so each upload stays small.
Each part finished in under a minute with a green message. The first one reported 370 queries.

Part 1 of 13 imported successfully.
After the last part, open the Structure tab and check the tables and row counts. We had all 56 tables, and the posts table had 7,565 rows, matching the old site.
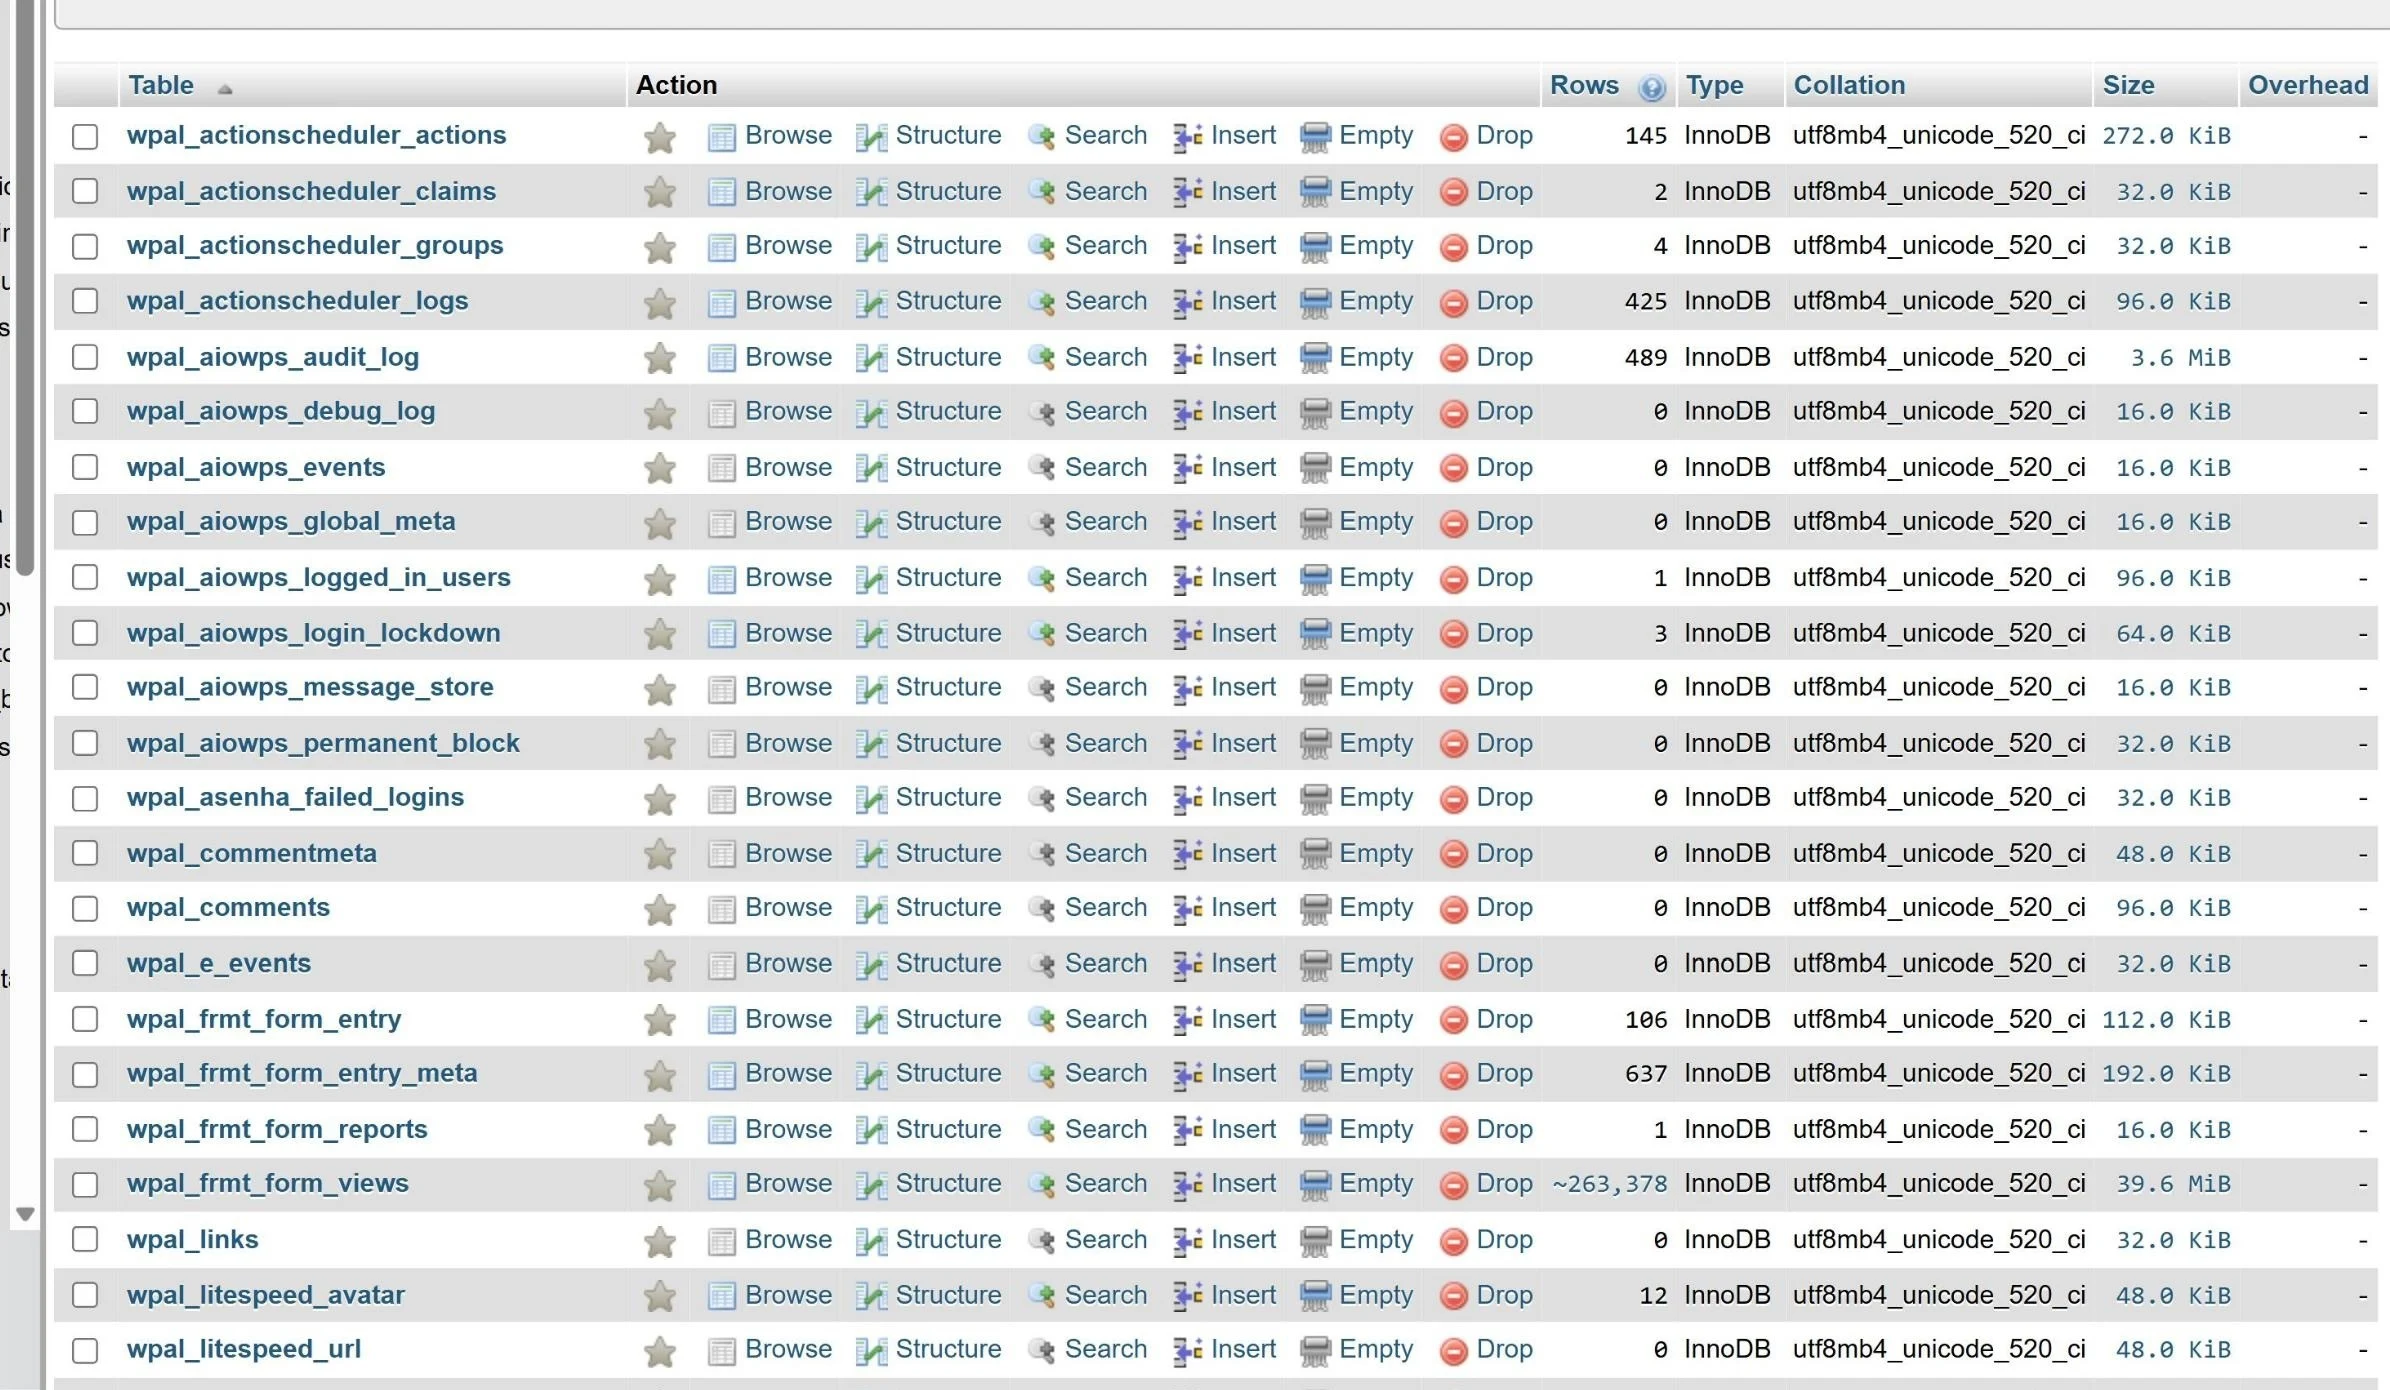
The Structure tab after all 13 parts: tables and rows are back.
Other options exist if your plan allows them, such as importing over SSH or with WP-CLI, or asking your host's support to import the file for you. We did not need them, so we have not tested them for this guide.
Test Everything on the Temporary Domain
Open the temporary address and click through the pages, the menu and the forms. If something is wrong, you fix it here and nobody notices, because the live site is still running on the old hosting.
Two things surprised us:
- The login page returned 404. The site used a security plugin with a custom login URL, so
wp-login.phpis hidden. That is normal for that plugin; use your custom login address. - hPanel showed the site as PHP/HTML, not WordPress. "Detect WordPress" was not enough, because the database was not linked to the website. We asked Hostinger's AI assistant to "link the database to the website", confirmed, and the WordPress overview and the WP Admin button appeared.
Switch the Domain Without Losing Email
This is the step that can break things you did not touch. When we deleted the website in the old account, the domain's DNS was reset, and the email records (MX, SPF, DKIM, DMARC) disappeared. We had saved a copy, so we added them back.
- Save every DNS record before you delete anything.
- Remove the website from the old account (the website, not the domain).
- Connect the domain to the new account and verify it with the TXT record it asks for.
- Point the A and www records to the new hosting, and add back your email records from your copy.
- Remove the two temporary
WP_HOMEandWP_SITEURLlines fromwp-config.php. - Wait for SSL (ours was issued automatically by Let's Encrypt) and test the real domain again.
Note that this method moves the website, not mailboxes. If you have mailboxes, export and import them separately.
Problems We Hit (and the Fix)
| Problem | What we saw | Fix |
|---|---|---|
| Migration tool refused | "We do not support migration of this site" | Restore manually from the backup |
| Big database | phpMyAdmin error 500 on a 245 MB import | Split into 13 parts and import in order |
| Wrong login details | Chrome autofilled the database form | Clear the fields and type your own |
| Extract failed once | File Manager error 409 | Check the folder before moving on; extract again if files are missing |
| Site not shown as WordPress | hPanel listed it as PHP/HTML | Link the database to the website |
| Login page 404 | wp-login.php not found | Use the security plugin's custom login URL |
| Email records gone | DNS reset after deleting the old website | Re-add MX, SPF, DKIM, DMARC from your saved copy |
FAQ
Why does phpMyAdmin give error 500 on a big import?
phpMyAdmin runs inside the web server, and a very large import can stop before it finishes. In our case, 245 MB failed, while parts of about 20 MB each finished in under a minute.
Can I split the SQL file at any line?
No. Each part must end on a complete statement, and a long INSERT has to be cut between rows, with the INSERT header repeated in the next part. Otherwise the import fails or data goes missing.
Will my live site go down during the restore?
Not if you restore on a temporary domain first. Your domain keeps pointing to the old hosting until you switch it.
Does this method move my email?
It keeps email working only if you restore the email DNS records. Mailbox contents are not copied; export and import them separately.
Conclusion
A large WordPress backup is not a reason to pay for a migration. Restore the files, split the database into clean parts, test on a temporary domain, and save your DNS records before you delete anything. That is exactly how we moved a 245 MB WordPress database to shared hosting without the live site going down.
If you are moving because your renewal got expensive, read Hostinger renewal prices explained first, and see our Hostinger review with the real cart price. Running custom PHP instead of WordPress? Our guide on hosting a PHP + MySQL app on shared hosting uses the same database steps. Comparing hosts first? Our hosting cost calculator adds up the real 4-year price, and our comparisons put the carts side by side.
Moving to Hostinger like we did? Check the Unlimited plan we restored this site on: unlimited websites and daily backups.
Need a new home for the site? See Hostinger's current price in the cart → and use coupon LEARN2EARN at checkout.
Affiliate link: we may earn a commission at no extra cost to you. It does not change our steps or recommendations.